Pear Crisp

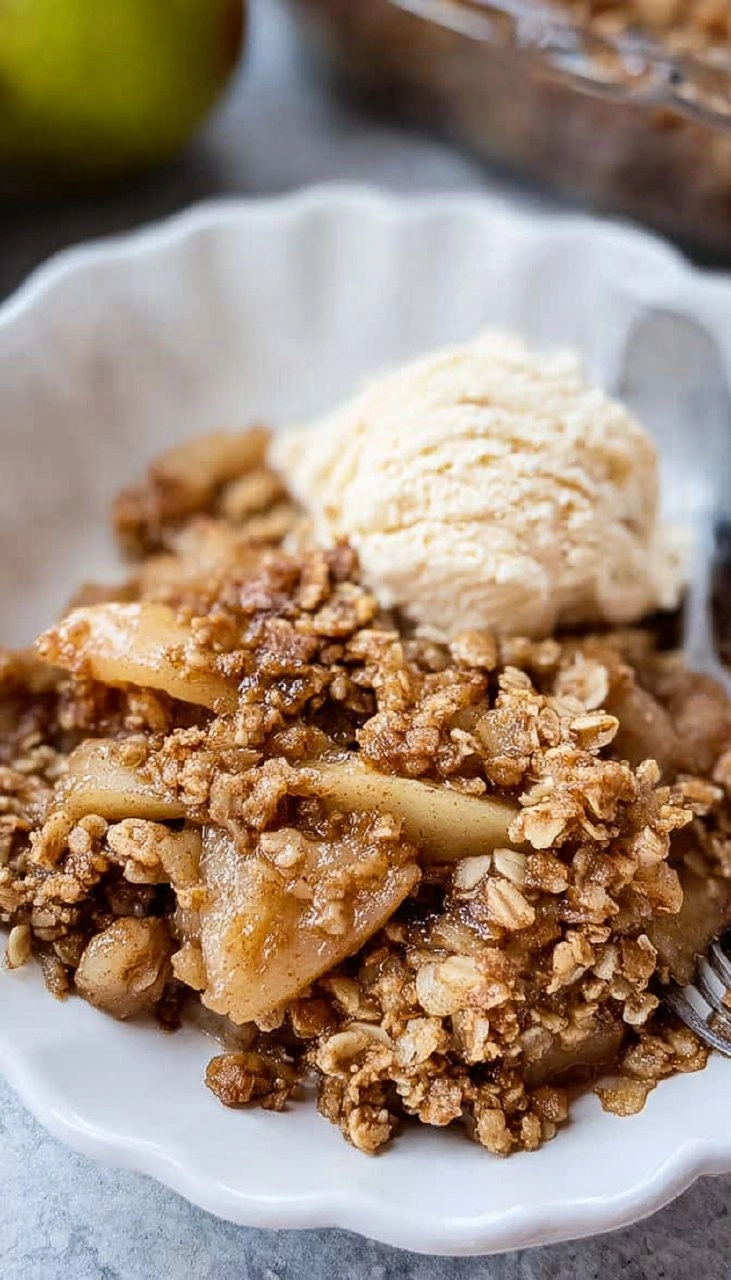
Pear crisp is the kind of dessert that embodies comfort and warmth, filling your home with an inviting aroma as it bakes. Made primarily of thinly sliced pears smothered in a buttery crisp topping, this dessert strikes the perfect balance between sweet and subtly spiced. Picture a golden-brown, crumbly topping that contrasts with the juicy, tender fruit beneath it. The texture is delightfully crunchy, making each spoonful a delightful experience.
Table of Contents
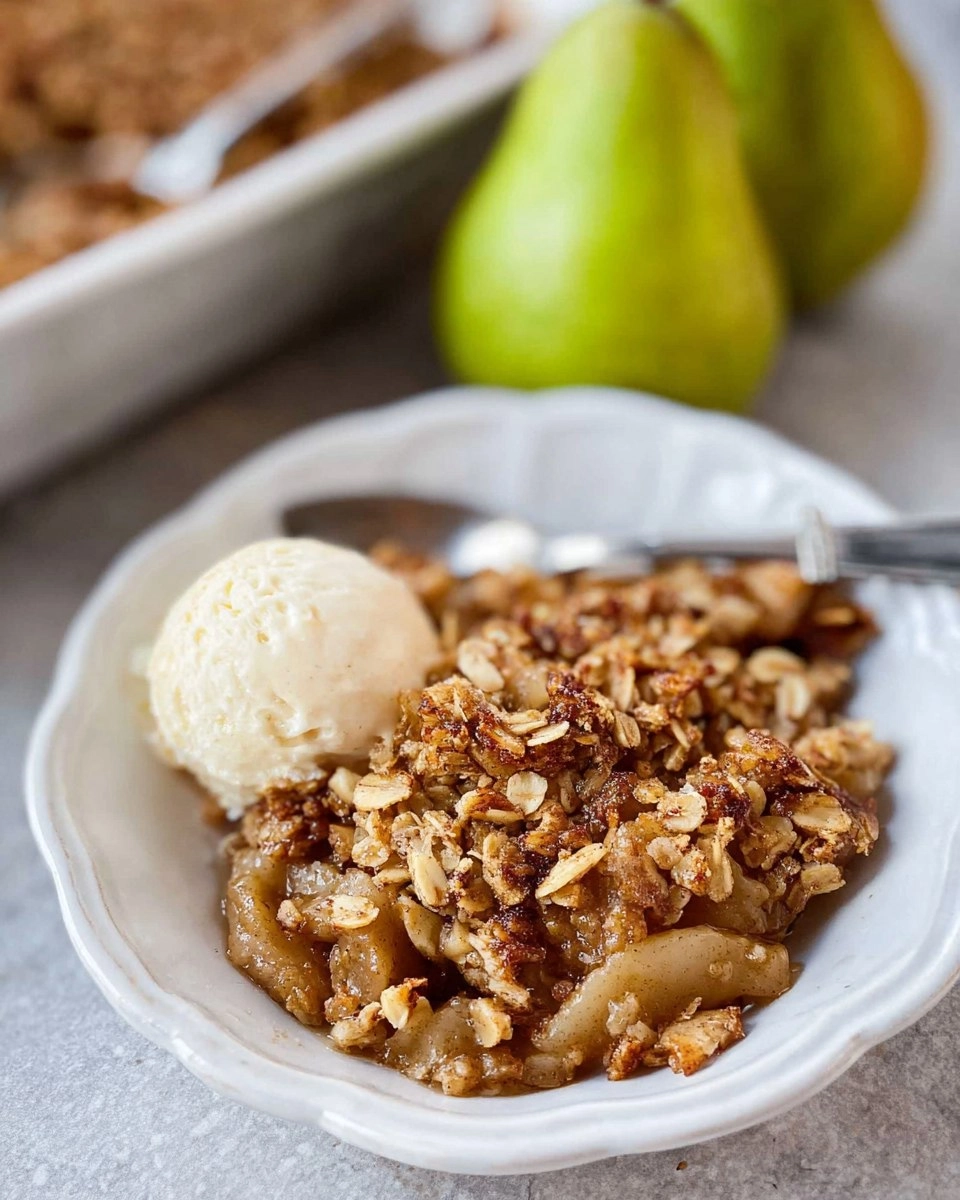
I remember the first time I made pear crisp. It was a cool autumn afternoon, and I had come home from the farmers’ market with a basket bursting with ripe pears. I was intrigued by the idea of transforming these simple fruits into a dessert that felt both classic and warm. What started as a spontaneous cooking adventure soon turned into a family favorite that graces our table every fall. This recipe turns simple, seasonal ingredients into a satisfying dish that’s ready to be enjoyed any time of year!
Why You’ll Love This Recipe
- Simple & Quick: With just a few steps, you can have this delightful dessert in less than an hour.
- Irresistible Flavor: The combination of cinnamon, nutmeg, and ripe pears creates a warming taste that sings of sweet autumn.
- Eye-Catching Appeal: The beautiful combination of colors from the golden topping and greenish-brown pears makes this dish as gorgeous as it is delicious.
- Flexible Serving: Perfect for any occasion— served warm with ice cream, or at room temperature as a lovely snack or breakfast.
- Diet-Friendly Options: Easily adaptable to gluten-free with the right flour choice, making it accessible for those with dietary restrictions.
Ingredients You’ll Need
- 4 cups pears, peeled and thinly sliced (about 5-6 pears): Fresh, ripe pears are the star of this dish. I recommend using varieties like Bartlett or Bosc, which become sweet and juicy when baked.
- 1/4 cup granulated sugar: This helps sweeten the pears without overpowering their natural flavor. You can substitute this with coconut sugar for a deeper taste.
- 1 tablespoon ground cinnamon: Adds warmth and spice, enhancing the natural sweetness of the pears.
- 1 teaspoon ground nutmeg: This fragrant spice brings a delightful depth; a tiny pinch can go a long way.
- 1 cup rolled oats: Use gluten-free oats if needed, providing both texture and a wholesome element to the crisp topping.
- 1/3 cup all-purpose flour: This binds the topping together; substitute with gluten-free flour for a modified option.
- 1/2 cup packed brown sugar: This results in a richer flavor, with molasses notes that pair nicely with pears; light or dark brown sugar works well.
- 1/2 cup pecans or walnuts (optional, chopped): These add crunch and a nutty flavor but can be omitted if nut-free.
- 4 tablespoons unsalted butter: Cold butter is best for creating a flaky topping. If dairy-free is your preference, coconut oil can be a suitable substitute here.
How to Make Pear Crisp
- Preheat the Oven: Start by preheating your oven to 350°F. Greasing a 2-quart baking dish with butter or a non-stick spray prevents sticking and promotes browning.
- Prepare the Pear Filling: In a large bowl, toss together 4 cups of peeled and thinly sliced pears, 1/4 cup granulated sugar, 1 tablespoon cinnamon, and 1 teaspoon nutmeg until the pears are evenly coated. Pour this mixture into the greased baking dish, spreading it into an even layer.
- Mix the Crumble Topping: Using the same bowl (less dishes to wash!), combine 1 cup rolled oats, 1/3 cup all-purpose flour, and 1/2 cup packed brown sugar. If you’re using nuts, add 1/2 cup chopped pecans or walnuts at this stage.
- Cut in the Butter: Cut in 4 tablespoons of cold unsalted butter into the dry mixture until it resembles coarse crumbs. You can use your fingers, a fork, or a pastry cutter. This step is crucial for that desired crispy texture!
- Assemble and Bake: Evenly sprinkle the crumble topping over the prepared pear filling. Bake in the preheated oven for about 45 minutes, or until the topping is golden brown and the pear juices are bubbling around the edges.
- Cool and Serve: Allow your pear crisp to cool slightly before serving. It can be enjoyed warm, at room temperature, or even chilled.
Storing & Reheating
Store any leftovers at room temperature for up to one day. For longer storage, move to an airtight container and refrigerate for up to 5 days. If you’re looking to keep it longer, pear crisp can be frozen for up to 3 months. Just be sure to cover it tightly with plastic wrap or aluminum foil. When you’re ready to enjoy it again, simply reheat in the oven at 350°F for 15-20 minutes until warmed through. The topping might lose a bit of its initial crunch upon reheating, but a quick broil will help refresh its texture!
Chef’s Helpful Tips
- Be careful not to overmix the crumble topping; it should be crumbly, not a dough.
- If you’re short on time, you can prepare the pear filling and topping separately ahead of time; just combine right before baking.
- If you find the filling too juicy, a tablespoon of cornstarch can help thicken it without changing the flavor.
- Experiment with different nuts or spices based on your preference; ginger, cloves, or even cardamom can create exciting variations!
- Make a double batch and share with family or friends; this pear crisp freezes beautifully!
Sometimes simplicity is the key to an extraordinary dish. This pear crisp proves how a handful of fresh ingredients can transform into something truly special. Whether you’re crafting a cozy dessert for intimate gatherings or a sweet treat for a weekday snack, this recipe offers all the warmth and texture you crave. Don’t hesitate to play with flavors or toppings as you make it your own—after all, every family recipe starts as a canvas for creativity. Enjoy every spoonful of joy!
Recipe FAQs
Can I use other fruits in this recipe?
Absolutely! Pear crisp is quite versatile. You can substitute apples, peaches, or even berries. Just keep in mind that different fruits may require slight adjustments in sugar.
How do I prevent the pears from browning?
To keep your sliced pears from browning before baking, toss them in a bit of lemon juice immediately after slicing. This will retain their lovely color and enhance the overall flavor.
Can this be made ahead of time?
Yes, you can prepare the filling and topping a day in advance. Just store them separately in the refrigerator and assemble just before baking for optimal freshness.
What’s the best way to serve pear crisp?
Serve warm with a scoop of vanilla ice cream or dollop of whipped cream on top – it’s the perfect combination that elevates this comforting dessert to a whole new level!
PrintMore Desserts & Appetizers Recipes
- Apple Cinnamon Blondies
- Strawberry Crunch Cookies
- Easy Guacamole | Authentic 5-Minute Fresh Dip for Chips & Tacos
- Lentil Bruschetta
- Apple Cinnamon Biscuit Bake
Did You Enjoy Making This Recipe? Please rate this recipe with ⭐⭐⭐⭐⭐ or leave a comment.
📖 Recipe Card
Pear Crisp
- Prep Time: 20 minutes
- Cook Time: 45 minutes
- Total Time: 1 hour 5 minutes
- Yield: 8 servings 1x
- Category: Desserts & Appetizers
- Method: Baking
- Cuisine: American
Description
This Pear Crisp delivers an irresistible flavor with its tender pears and a crumbly oat topping. Perfect for comfort food lovers, it’s easy to prepare and sure to impress!
Ingredients
- 4 cups pears, peeled and thinly sliced (from 5–6 pears)
- 1/4 cup granulated sugar
- 1 tablespoon ground cinnamon
- 1 teaspoon ground nutmeg
- 1 cup rolled oats (gluten free, if needed)
- 1/3 cup all purpose flour (gluten free, if needed)
- 1/2 cup brown sugar, packed
- 1/2 cup pecans or walnuts, chopped (optional)
- 4 tablespoons unsalted butter
Instructions
- Preheat the oven to 350°F and grease a 2-quart baking dish with butter or non-stick cooking spray.
- In a large bowl, combine the sliced pears, granulated sugar, cinnamon, and nutmeg. Pour this mixture into the prepared baking dish, spreading it into an even layer.
- In the same bowl, mix the oats, all-purpose flour, and brown sugar. If using, stir in the chopped pecans or walnuts.
- Cut the butter into the dry mixture using a fork, pastry cutter, or your fingers until crumbles form.
- Sprinkle the crumb mixture evenly over the layer of pears in the baking dish.
- Bake for 45 minutes, or until the topping is golden brown and the pears are bubbling around the edges. Let it cool slightly before serving.
- Serve warm, at room temperature, or chilled.
Notes
You can use gluten-free flour and oats for a gluten-free version of this dish.
Feel free to add berries or other fruits to the pear mixture for added flavor.
Store leftovers in an airtight container in the refrigerator for up to 3 days.
Nutrition
- Serving Size: 1 serving
- Calories: 280
- Sugar: 15g
- Sodium: 150mg
- Fat: 12g
- Saturated Fat: 7g
- Unsaturated Fat: 3g
- Trans Fat: 0g
- Carbohydrates: 40g
- Fiber: 4g
- Protein: 3g
- Cholesterol: 25mg